My husband Josh and I are building an infill home in one of Saskatoon’s older neighbourhoods. Josh works in construction so he’s acting as our general contractor. He’s overseen the plumbing, electrical, and mechanical elements, while I’ve been making the design decisions. The process has been both exciting and stressful, but we’ve received lots of helpful advice from people who’ve been in our shoes. Here are three of the latest home building tips I’ve learned from others, or learned the hard way:
- Visit the site as much as possible.
 Even if you’ve hired a general contractor, visit your building site as often as possible – daily if you can swing it. You will likely find mistakes and oversights, and catching them early usually means they can be fixed quickly and easily.
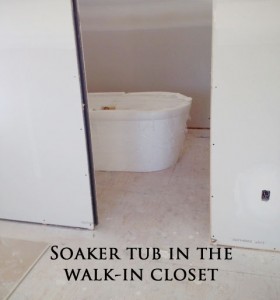
One of our plumbers had to move our soaker tub out of the master bathroom while the pipes were being installed. He moved it to our walk-in closet and soon after, the drywallers got to work. They drywalled the walk-in closet with the tub still sitting there and now the tub won’t fit through the door. Had we visited the site that day, we wouldn’t currently be dealing with a bathroom/closet hybrid. Josh is confident that – with another set of strong arms – he can lift the tub, flip it sideways and fit it through the door frame. If that doesn’t work, the drywall around the door frame will have to come down. Fingers crossed for Plan A.

- Borrow samples of finishing materials.
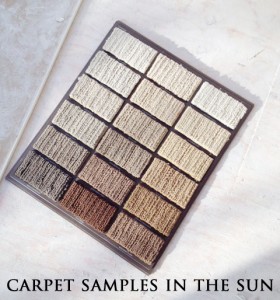 The colour of any finishing material can look quite different in the store versus the place where it’ll eventually be installed. Ask for samples and take them to your building site. View the material in both shade and direct sunlight. The bigger the sample, the better. This goes for everything: carpet and hardwood samples, countertops, tile, and exterior finishes like brick, stone, and stucco.
Our home’s exterior will be a mix of stucco, cedar and brick. We couldn’t decide between two shades of dark-grey stucco, so we gave our installers the two paint swatches we were considering. They mixed two samples and created two stucco boards which we brought to the site to hold up in the sunlight and shade. It made the decision much easier. When it came time to choose the brick, we borrowed light-grey samples that would contrast with the stucco. In the sunlight, a few samples looked pinkish-grey so they were taken out of the running.
If you’re deciding on an exterior material like brick, stone or even roofing, ask the supplier if there’s a home clad in that material that you can go take a look at. In our case, we liked particular shade of brick and were given an address where we’d find a home entirely clad in that particular shade. Once we saw the home in person, we decided it wasn’t quite our style.

- Once you’ve made your choices, stop looking and comparing.
This is has been one of my biggest struggles. We now have a plethora of places for gleaning new design ideas: Pinterest, décor magazines, HGTV, Houzz, the list goes on. Just when you think you’ve found the perfect pendant lights for your island, you catch a glimpse at one of Sarah Richardson’s latest kitchens and decide that you’ve made the wrong choice. You suddenly can’t live without Sarah’s sparkling silver pendants.I have to remind myself that I’ve done my research, having poured over hundreds of lighting options in the past year. There will always be new products coming out, and the more you look around, the more you’ll second guess yourself. Once you’ve shopped around, make your decision and be confident you’ve made the right choice. And if you simply can’t stop looking, make a Pinterest board for your next home, or your next renovation.